Installation on Windows
To install GeoServer Enterprise in MS Windows, follow these steps.
Java Runtime Environment
GeoServer Enterprise requires a Java 17 runtime environment.
OpenJDK is now the lead project for the Java ecosystem. As an open-source company GeoCat is pleased to see OpenJDK supported by a number of different distributions.
OpenJDK JDK (Recommended)
To install the OpenJDK JDK using the Temurin OpenJDK MSI installer:
-
Navigate to the Eclipse Temurin releases page, confirming the JDK 17 - LTS tab is selected.
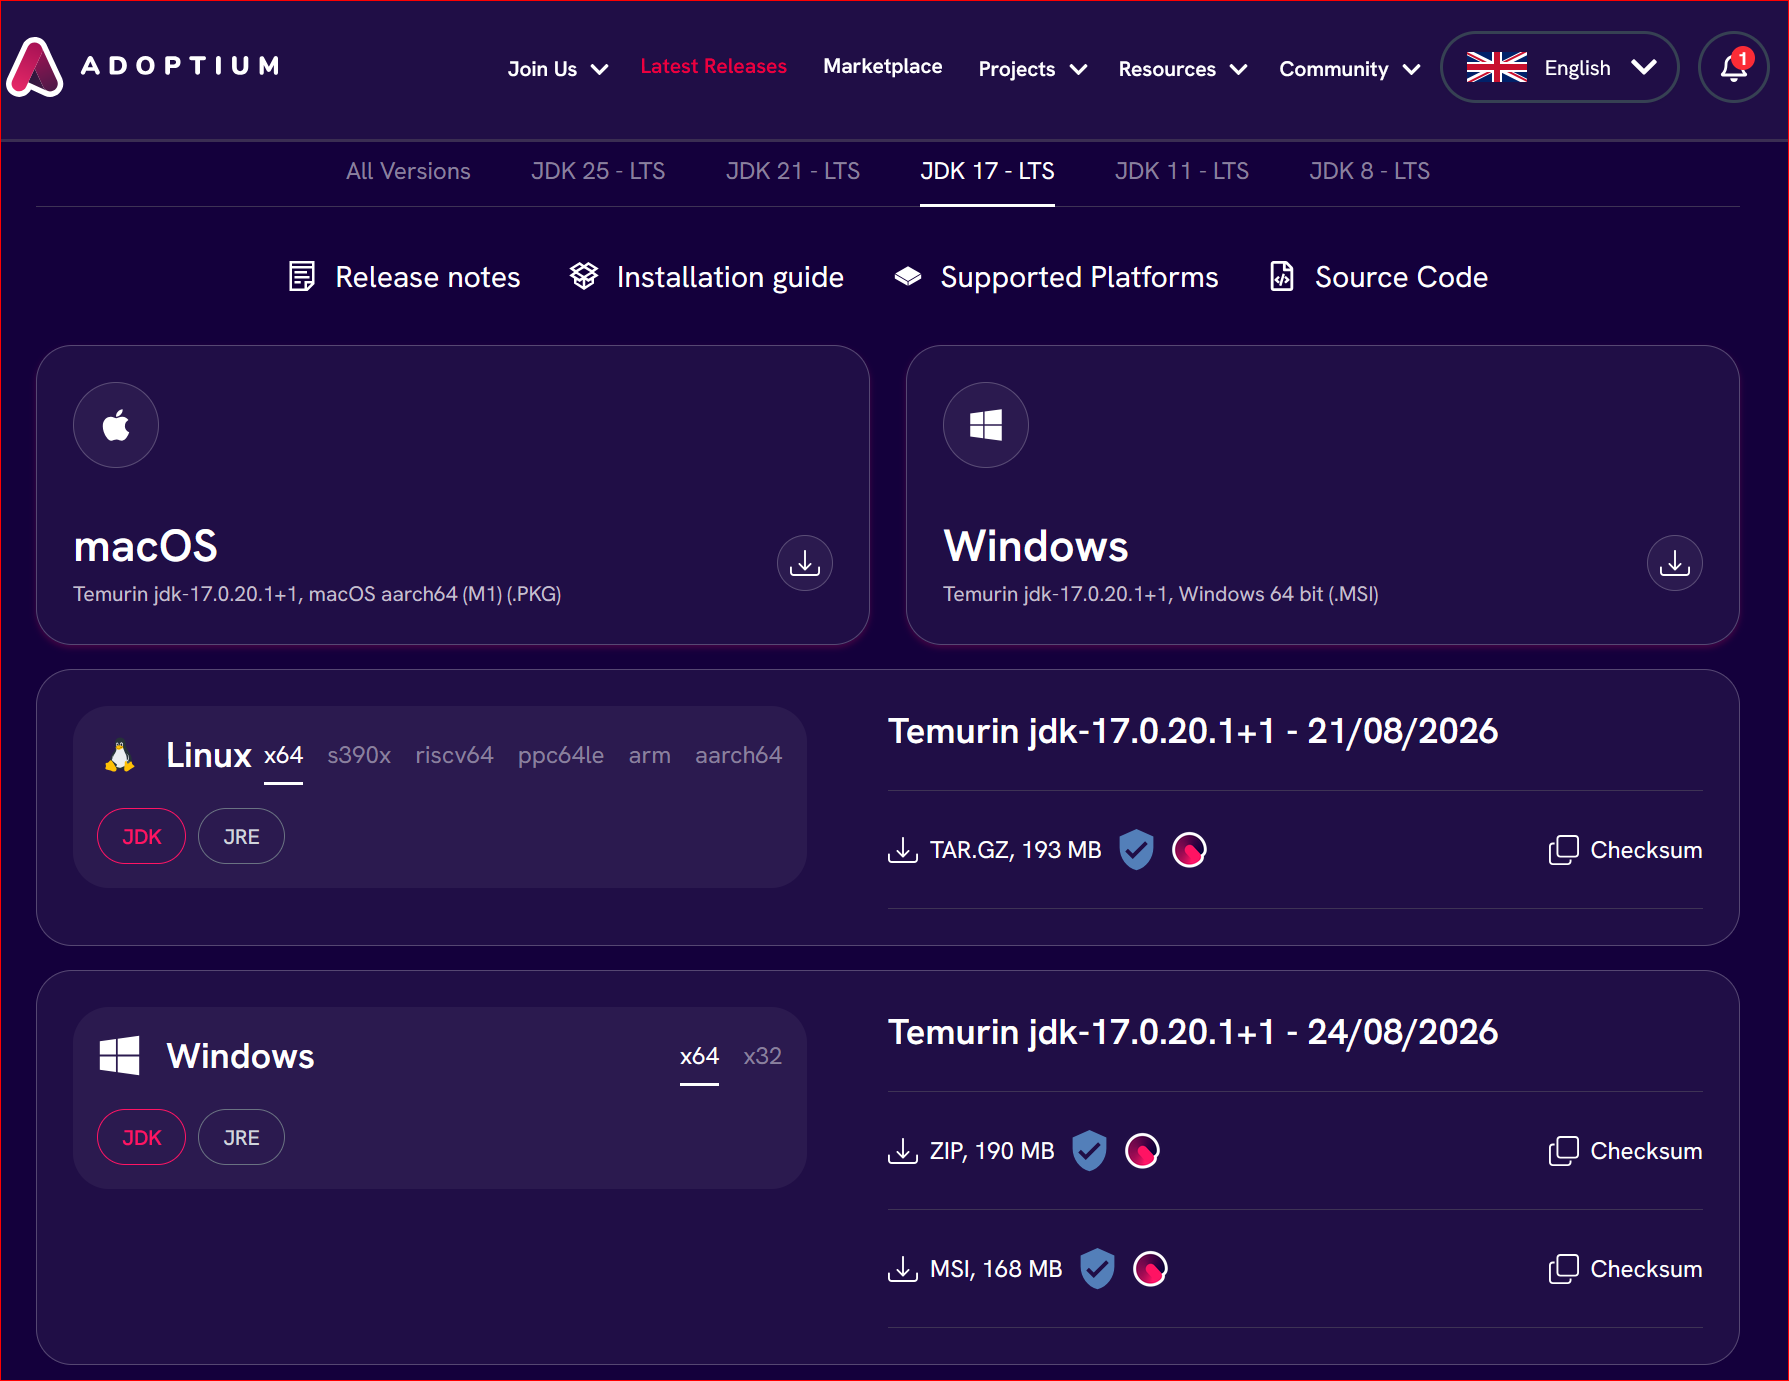 Windows and Linux downloads are both available from this one page
 -
In the Windows row, leave
JDKselected and click theMSIdownload. -
Run the installer. On the Custom Setup page, leave
Modify PATH variableandSet or override JAVA_HOME variableenabled.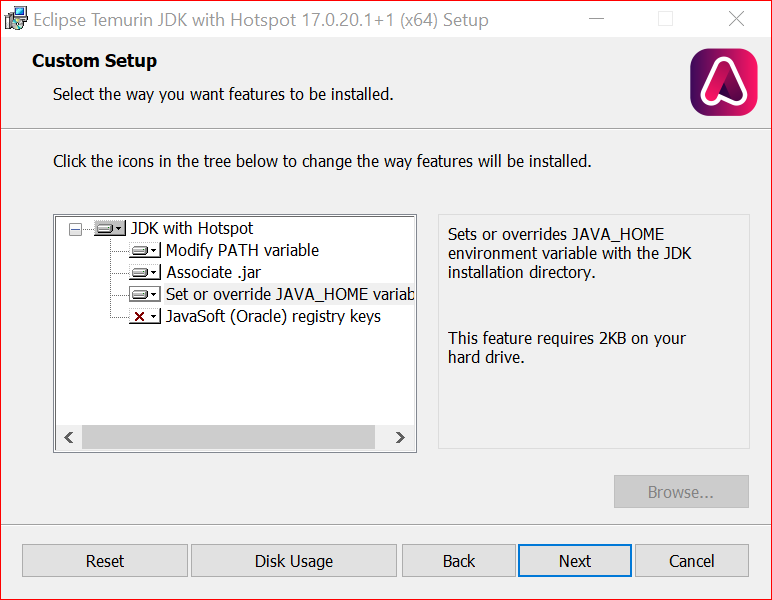
-
To ensure that Java is now correctly installed, open a console and type
java -version. The output should look something like this:
OpenJDK JRE (Alternative)
To install the OpenJDK JRE using the Temurin binary distribution:
-
On the Eclipse Temurin releases page, switch the Windows row toggle to
JREand download theZIP. -
In your system, create a folder called
javaunder yourProgram filesfolder. -
Extract the content of the downloaded zip file into that folder. Your folder structure under the
Program Filesfolder should now look like this: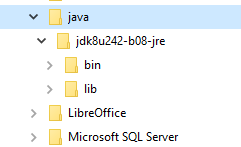
-
Open the Windows System configuration by going to Start Menu > Control Panel > System and then click on the Advanced system settings link. Move to the Advanced tab.
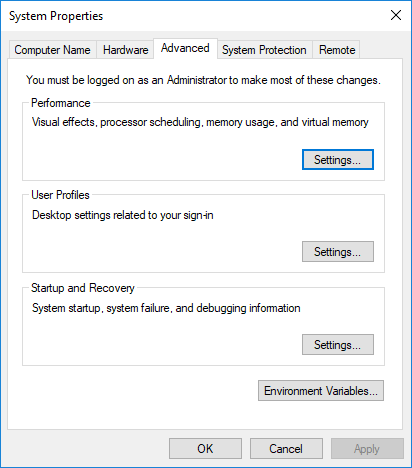
-
Click on the Environment variables button.
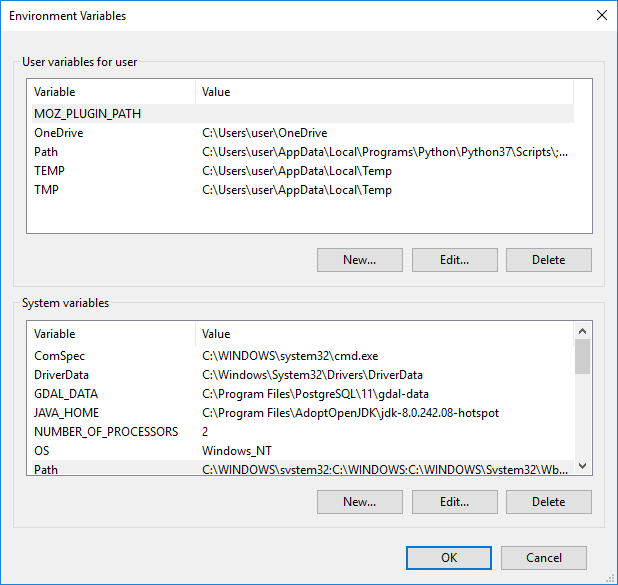
-
In the System variables section, click on New to create a new variable. Enter the following values to configure the new variable:
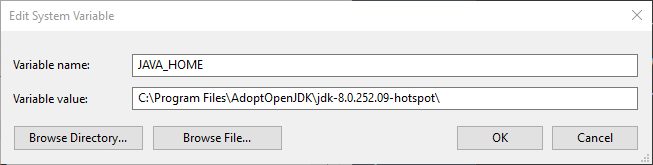
-
Edit the
Pathvariable by selecting it and clicking on Edit.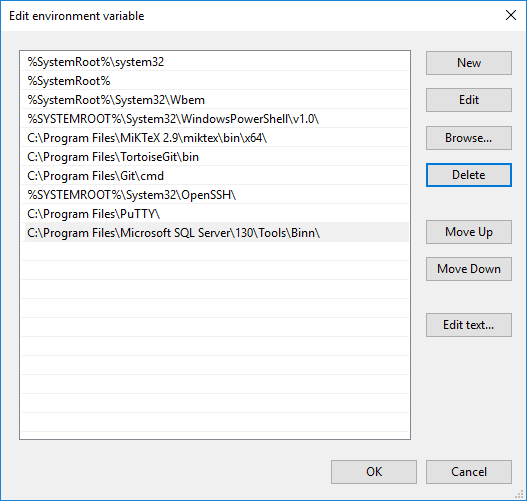
-
Click on New to add a new line to the variable and enter
%JAVA_HOME%\binto add the Java JRE folder to your system PATH.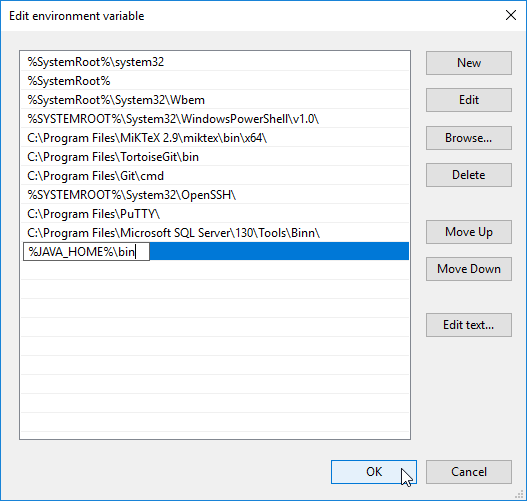
-
Close the Environment variables and Windows System configuration dialog.
-
To ensure that Java is now correctly installed, open a console and type
java -version. The output should look something like this:
Apache Tomcat
Apache Tomcat is the leading open source application server.
GeoServer Enterprise requires Apache Tomcat 11.0.x.
To install Tomcat, follow these steps:
-
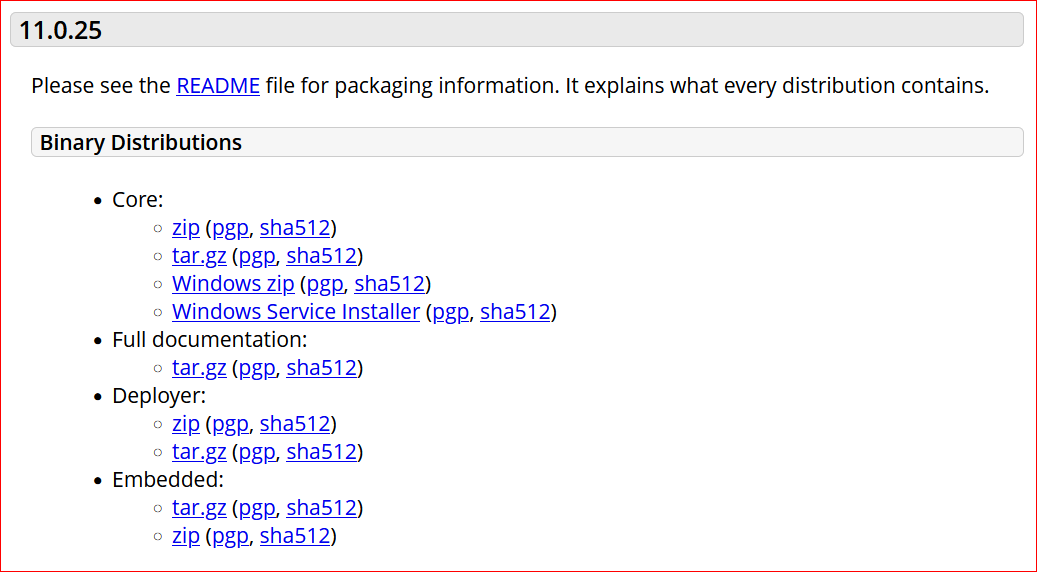
Visit the Apache Tomcat Download page.
-
Under Binary Distributions download the Windows Service Installer (pgp, sha512).
-
Run the installer, this will setup:
- Apache Tomcat
- Tomcat Properties user interface to control configuration and settings
-
Choose Components page: select the
NativeandService Startup, andManageroptions.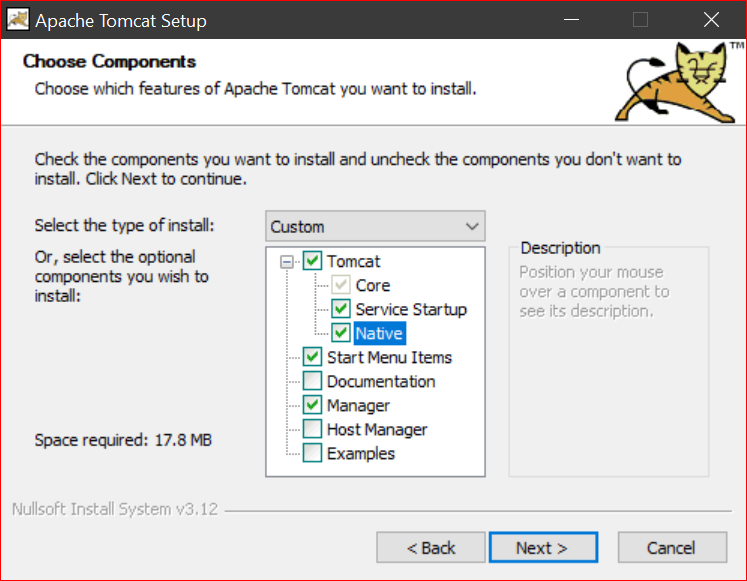
-
Configuration page: provide Tomcat Administrator Login credentials:
User Name adminPassword: tomcat(example)Roles manager-gui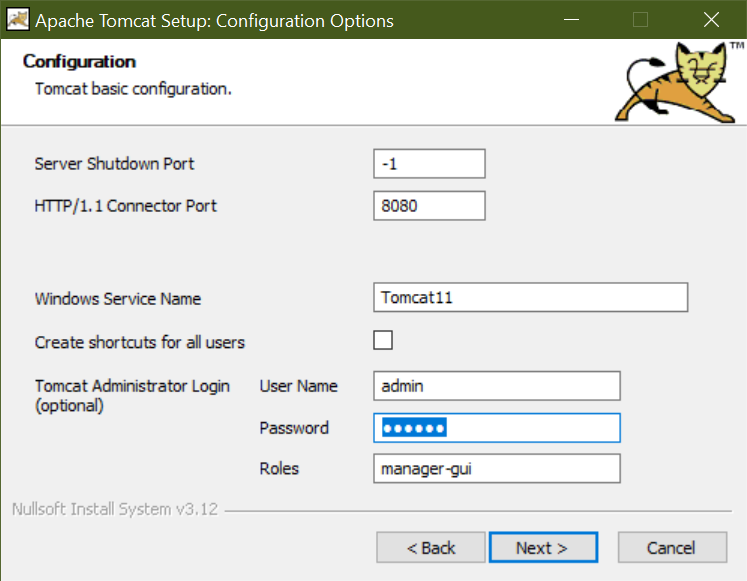
The installer registers the Windows service as
Tomcat11by default. -
Use browser to confirm server is running:
-
Once installed, Tomcat has to be correctly configured to provide a better performance when running GeoServer Enterprise. The first thing to configure are its Java Virtual Machine runtime parameters.
-
From the Windows Start menu select Apache Tomcat > Configure Tomcat to open Tomcat Properties.
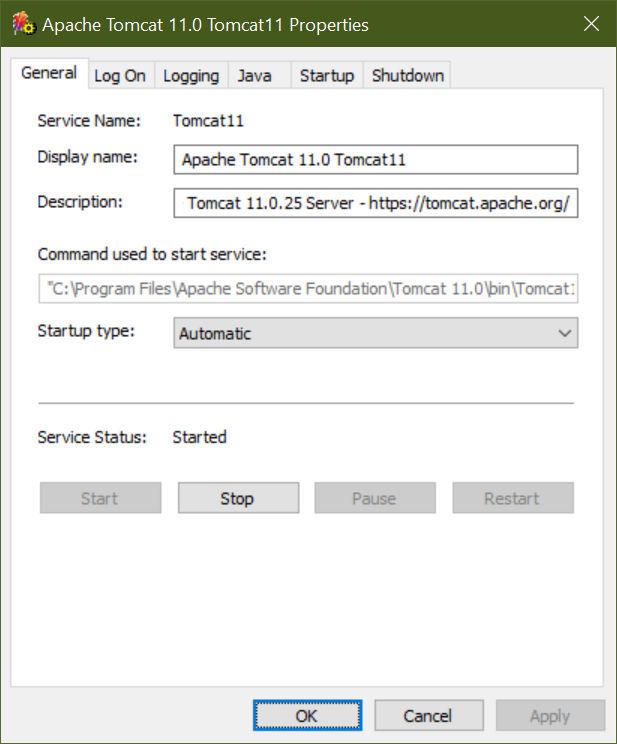
Note
On a fresh install the short cut above may be unable to start a permissions issue:
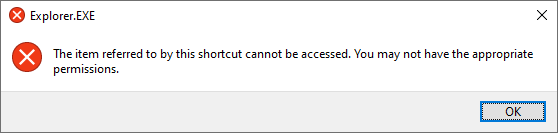
To resolve navigate to the
C:\Program Files\Apache Software Foundation\Tomcat 11.0which will prompt to grant access to this directory. -
Change to Log On tab, select:
Local System account: selected Allow service to interact with desktop checked 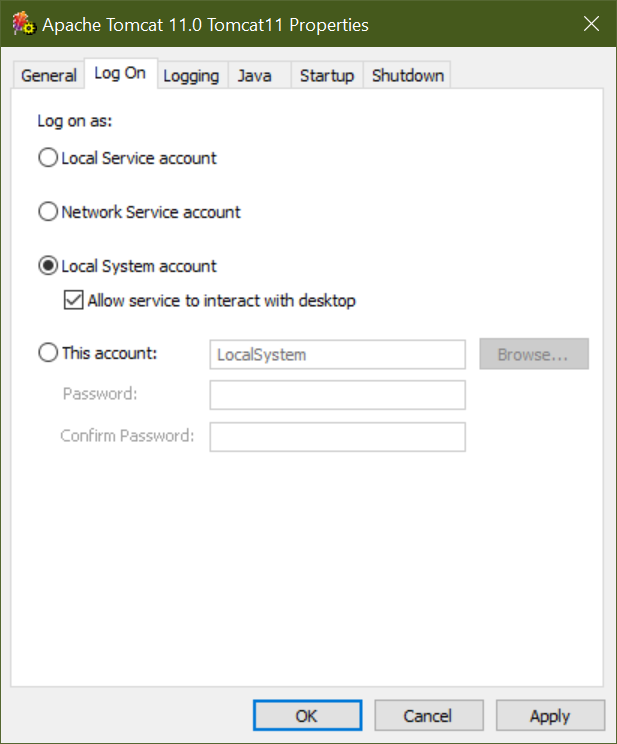
-
Change to the Java tab, add the highlighted lines below to Java Options:
-Dcatalina.home=C:\Program Files\Apache Software Foundation\Tomcat 11.0
-Dcatalina.base=C:\Program Files\Apache Software Foundation\Tomcat 11.0
-Djava.io.tmpdir=C:\Program Files\Apache Software Foundation\Tomcat 11.0\temp
-Djava.util.logging.manager=org.apache.juli.ClassLoaderLogManager
-Djava.util.logging.config.file=C:\Program Files\Apache Software Foundation\Tomcat 11.0\conf\logging.properties
-XX:SoftRefLRUPolicyMSPerMB=36000
-XX:-UsePerfData
-Dorg.geotools.referencing.forceXY=true
Update the memory options to:
Initial memory pool: 2048MBMaximum memory pool: 4096MB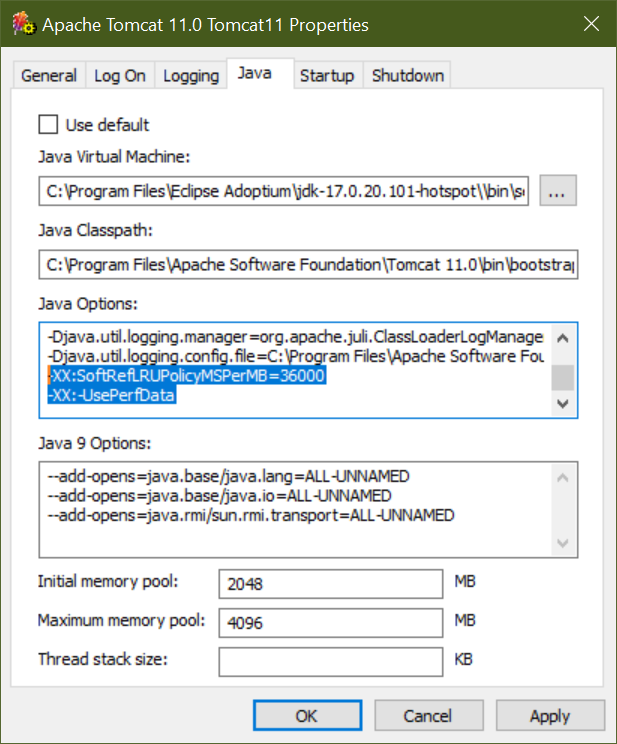
Note
The values above are a good starting point for a normal to large number of users. See Memory sizing for guidance on choosing a profile, and Garbage collection tuning for larger deployments.
Java 9 Options
Tomcat 11 adds a separate Java 9 Options field, pre-populated with the
--add-opensflags Tomcat needs to access JDK internals under the Java module system. Leave these as installed unless GeoCat support advises otherwise. -
Return to General tab:
-
Use the Apply button to update the service with these settings.
-
Use the Stop and Start buttons to restart the service
-
-
From http://localhost:8080/ click Server Status to confirm available memory, under the JVM heading.
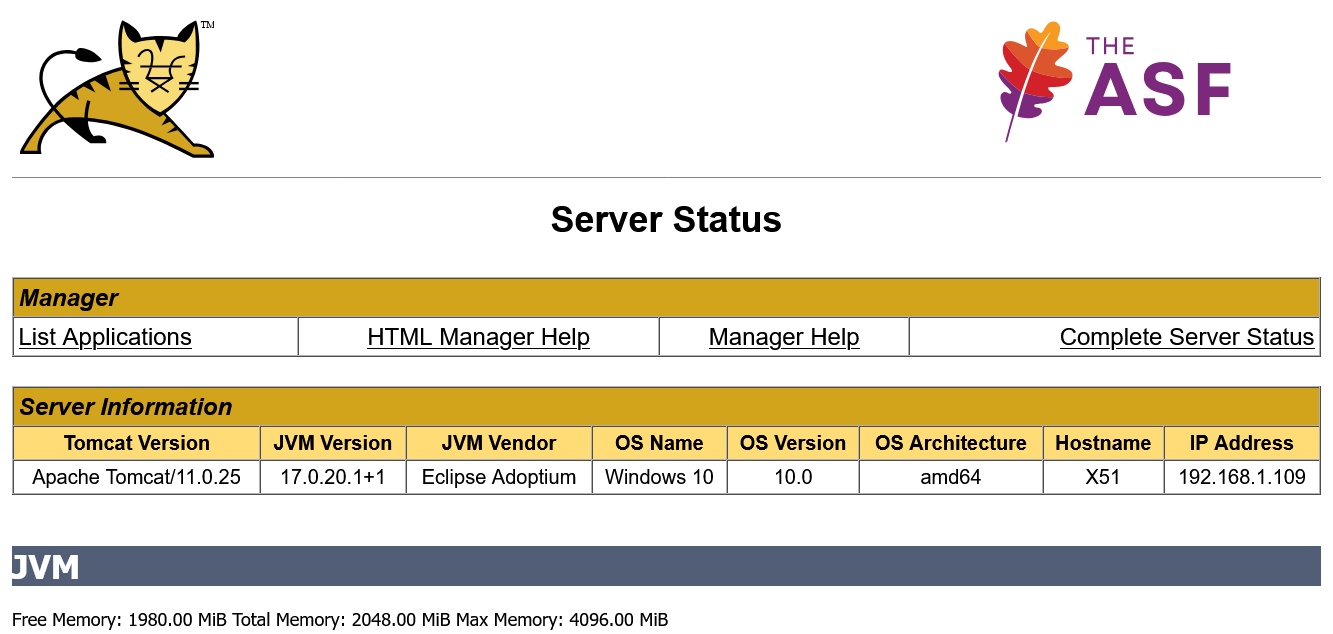
Note
The tomcat manager requires the Tomcat Administrator Login credentials used during installation.
-
Optional: Environment variables can be managed using the optional bin/setup.bat file:
JAVA_HOMECATALINA_OPTS: additional Java startup options used when launching Tomcat
Data Directory
GeoServer places all its required configuration files in a data directory.
We recommend starting with a ready-to-use data directory stored in C:\ProgramData\GeoServer:
-
Create a folder to hold your GeoServer Enterprise configuration:
C:\ProgramData\GeoServer\
-
GeoCat provides a choice of two ready to use data directories:
geoserver-data-standard.zip- services setup, includes sample layers.geoserver-data-default.zip- services setup only.
-
To download:
-
GeoCat Enterprise customers login to nexus.geocat.net and browse to the enterprise folder:
https://nexus.geocat.net/#browse/browse:enterprise
Navigate to the latest
geoserverrelease, and downloadgeoserver-data-default.ziporgeoserver-data-standard.zip.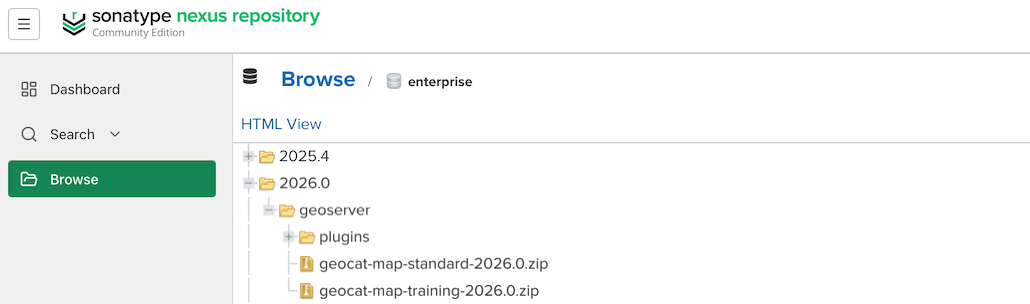 GeoServer Enterprise downloads geoserver data zip archives
 -
GeoCat Training customers are provided with
geoserver-data-standard.zipdata directory as part of course materials.
-
-
Unzip, and copy the
datafolder.C:\ProgramData\GeoServer\data.
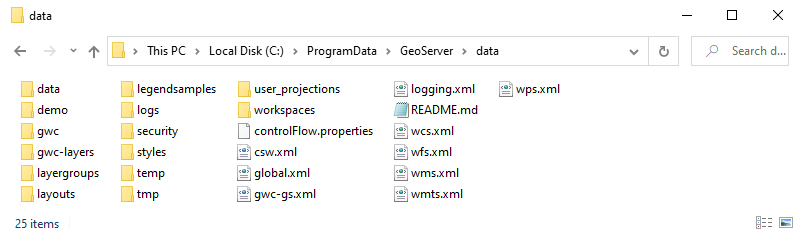 GEOSERVER_DATA_DIR
 -
Create the
tilecachefolder.C:\ProgramData\GeoServer\tilecache
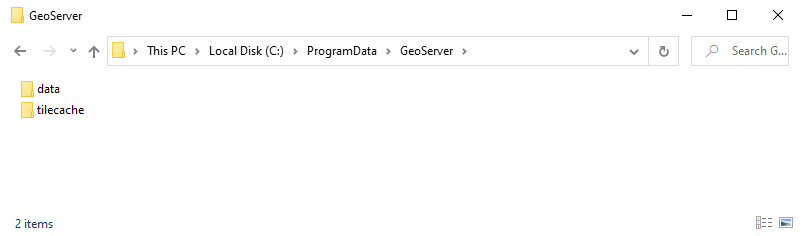 GEOWEBCACHE_CACHE_DIR
 -
Update the Tomcat configuration with these directory locations.
-
Open the Tomcat folder, by selecting the Apache Tomcat > Tomcat Program Directory menu entry in the Windows Start menu.
-
Navigate to the
conf\catalina\localhostsubfolder. -
In the
localhostfolder, create a geoserver.xml file, with the following content:<Context> <Parameter name="GEOSERVER_DATA_DIR" value="C:\ProgramData\GeoServer\data" override="false"/> <Parameter name="GEOSERVER_REQUIRE_FILE" value="C:\ProgramData\GeoServer\data\global.xml" override="false"/> <Parameter name="GEOWEBCACHE_CACHE_DIR" value="C:\ProgramData\GeoServer\tilecache" override="false"/> </Context>
-
Starting with an empty data directory
GeoServer can also be configured to start with an empty folder, GeoServer will generate configuration files to this folder the first time it runs:
-
Create an empty folder
C:\ProgramData\GeoServer\data -
Remove the
GEOSERVER_REQUIRE_FILEstartup check forglobal.xml:
This approach is often used in automated workflow where GeoServer is configured via REST API scripts.
GeoCat Map
To install GeoCat Map on your existing Tomcat instance, follow these steps:
-
Login to nexus.geocat.net and browse to the enterprise folder:
Navigate to the latest
geoserverrelease and select thegeocat-map-standardzip archive. -
Unzip this file containing:
windows- sample configuration filesgeoserver.war- geoserver enterprise web applicationGPLandLICENSE.txtopen source license information
-
Open the Tomcat Program folder by using the Start menu to select Apache Tomcat > Tomcat Program Directory.
-
Open the
webappsfolder. -
Copy the
geoserver.warfile to the to tomcatwebappsfolder.Tomcat will deploy
geosever.warweb application, creatinggeoserverfolder for the running application. -
In your web browser, navigate to http://localhost:8080/geoserver to verify that GeoServer Enterprise is correctly working.